Friday, February 17, 2017

Concrete planters (DIY!)

These DIY concrete garden planters are simple to make in just a weekend and with materials you may already have around the house. They look modern with unique shapes that come straight from the recycling bin!

Here there is a tutorial with steps and materials:

Materials:

  1. Plastic containers as molds—choose all sorts of shapes for the molds, but make sure that the plastic is strong enough to hold the shape of heavy concrete. If the sides of the container are too flimsy, they will warp and you will get some weirdly-shaped planters (although they may also turn out kind of fabulous!).
  2. Cooking oil
  3. Foam brush
  4. Fine concrete (topping or repair concrete)—standard concrete has gravel in it and these larger stones will affect the overall look of your planters. Look for a smooth concrete made of sand and no large rocks, typically used to repair concrete or as a top coat for rough surfaces. As long as the planter isn’t huge, this will be the best concrete to choose.
  5. Trowel
  6. Rocks
  7. Instructions
  8. Drill
  9. Concrete drill bit

Thoroughly grease the containers with cooking oil so that the concrete doesn’t stick. It can be tough to get the concrete out of the molds, so take some time and grease them up well. 

Mix the concrete by following the instructions on the package. Scoop concrete into a large mold and set a second, smaller mold into the first one. Make sure that you grease both the outside and the inside of the smaller mold. You can fill the smaller one with more concrete and insert an even smaller mold in that one. Keep going until the planters get too small and fill the final one with some pebbles to weigh it down.
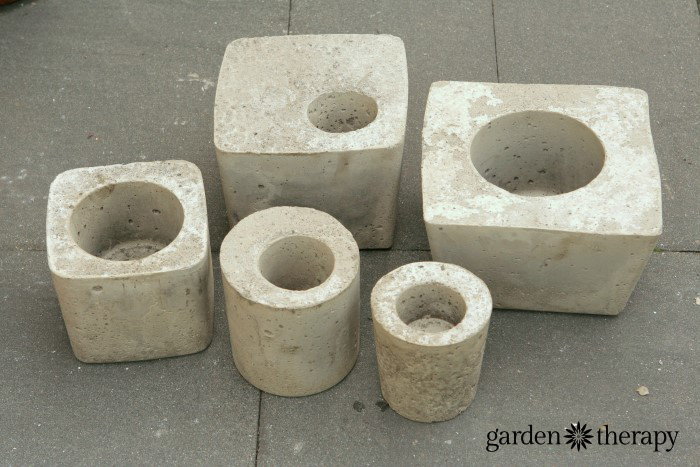


Top up all of the planters with more concrete and tap them to remove bubbles. Smooth the surface so they even.


Let the planters dry for 24 hours. Unmold them by shaking the concrete loose, or cutting it away where it is too difficult to remove. It may take a bit of work.
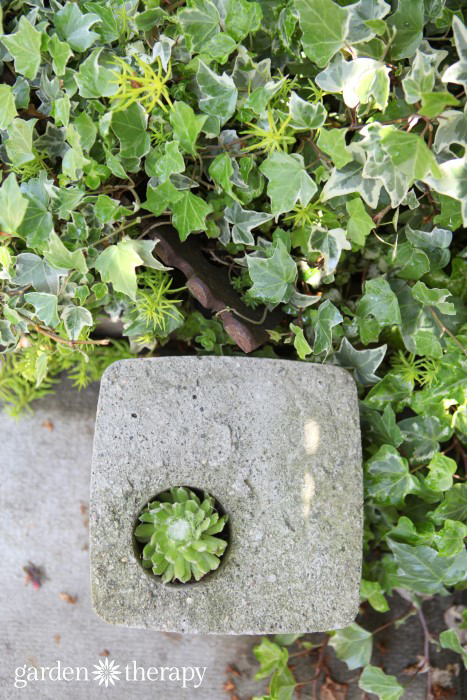


Now, let the containers cure for another week or so to ensure that they are fully ready for drilling. Use a concrete drill bit to drill a hole into the bottom of the planter for drainage.


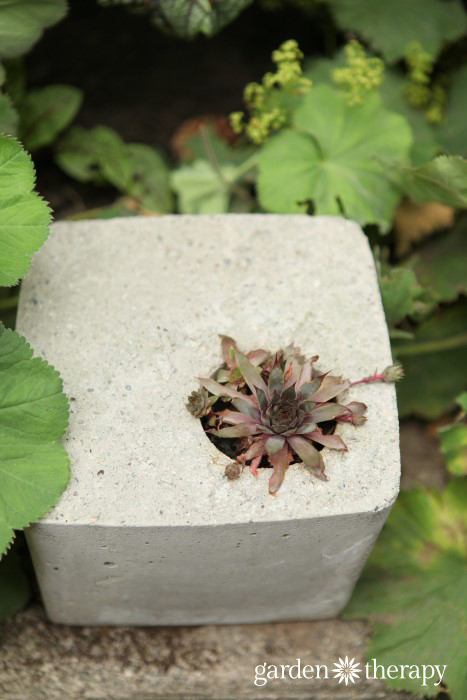
Plant them up with sedum or annuals and keep them well watered. Set them around the garden and enjoy!

Here you have some instructional videos to make more designs!


Sources:
http://www.potterybarn.com/products/concrete-fluted-planters/
http://gardentherapy.ca/how-to-make-concrete-planters/

Dry Garden (Gallery!)

Water is a precious resource locally and globally. Rainfall in Cambridge has averaged only 557 mm annually over the last 30 years and Cambridge’s climate is classified as ‘semi-arid’. The Dry Garden has been designed as a beautiful, water-wise planting suitable for a typical south-facing back garden in the City.

We have imposed a permanent hosepipe ban in the Dry Garden, but it nevertheless flourishes. This has been achieved principally through selecting plants that can survive short-term drought and using appropriate horticultural techniques, such as applying thick, moisture-conserving mulches and planting closely to help reduce loss of water from the soil.

Of the 100 different species that thrive here, many are Mediterranean natives such as Lavender, Thyme and Blue Spurge (Euphorbia myrsinites). Commonly, drought-tolerant plants have small leaves that reduce water-loss. They can be silvery and reflect heat, or hairy and trap moisture. Bulbs and annuals both demonstrate life-cycles that avoid summer drought and are featured strongly. Bulbs flower, die down and survive as underground storage organs through the summer, while annuals grow, flower and set seed early in the year to ensure the next generation in the space of just a few months. There are also a number of British endemics included, on the basis of many years observation of what grows easily in the Botanic Garden. These include Stinking Iris (Iris foetidissima), the Sea Buckthorn (Hippophaƫ rhamnoides), and even the Male Fern, Dryopteris filix-mas.

A pergola forms the backdrop to the Dry Garden and is draped with drought-tolerant climbers such as Clematis armandii and Vitis purpurea that provide light shade for the table and chairs here. This affords the perfect spot from which to take notes on how to incorporate water-wise gardening into your own garden at home.


Source: http://www.botanic.cam.ac.uk/Botanic/Place.aspx?p=27&ix=10&pid=2705&prcid=4&ppid=2705 and http://relisco.com/mainpage/detail/dry-garden
.

Japanese Garden

Japanese gardens utilize elements such as ponds, streams, islands and hills to create miniature reproductions of natural scenery. The following are some of the most commonly employed elements:


Stones, Gravel and Sand

Since ancient times, stones have played an important role in Japanese culture. In Shinto, prominent large stones are worshiped as kami, while gravel was used to designate sacred grounds, as seen at some ancient shrines such as the Ise Shrines or Kyoto's Kamigamo Shrine.

In today's gardens, large stones symbolize mountains and hills, set decorative accents and serve as the building material for bridges and pathways. Smaller rocks and gravel are used to line ponds and streams. Meanwhile, dry gardens are comprised entirely of stones, with larger stones symbolizing mountains, islands and waterfalls, while gravel and sand replace water.


Ponds, Streams and Waterfalls

Ponds are a central element of most gardens and often represent real or mythical lakes or seas. Sometimes they provide a habitat for carps (koi) which introduce additional color and life to the garden. In dry gardens, ponds, streams and waterfalls are symbolized by raked gravel, sand and upright stones.

In recreational types of gardens, ponds can be used for boating or enjoyment from pavilions built out over the water or from plazas and embankments on shore, which often served as the site for aristocratic poetry or moon viewing parties in past centuries.


Islands and Bridges


Islands are another long standing component of Japanese gardens, and range in size from single stone outcroppings to large islands big enough to support buildings. They often represent real islands or have religious symbolism, such as those built to resemble turtles and cranes, symbols of longevity and health, or Horai, a sacred mystical mountain in Taoism.

Bridges are another common feature that is used to connect islands and cross streams or ponds. They are built of stone or wood, and range in complexity from a simple slab of uncut rock laid across a stream to elaborate, covered wooden structures that span more than ten meters.


Vegetation

Trees, shrubs, lawns and flowers of all kinds are used in Japanese gardens. Plants, such as maple and cherry trees, are often chosen for their seasonal appeal and are expertly placed to emphasize these characteristics. Conversely, pine trees, bamboo and plum trees are held in particular esteem for their beauty during the winter months when other plants go dormant. Mosses are also used extensively, with over a hundred species appearing at Kokedera alone.

Plants are carefully arranged around the gardens to imitate nature, and great efforts are taken to maintain their beauty. Trees, shrubs and lawns are meticulously manicured, and delicate mosses are swept clean of debris. During winter, straw, burlap and ropes are used to insulate and protect the trees and shrubs from the freezing snow, while straw wraps protect against bug infestations.


Lanterns

Lanterns come in a variety of shapes and sizes and have been a common element of Japanese garden design throughout history. They are usually made of stone and placed in carefully selected locations, such as on islands, at the ends of peninsulas or next to significant buildings, where they provide both light and a pleasing aesthetic. Lanterns are often paired with water basins (see more details below), which together make up a basic component of tea gardens.

Water Basins

Many gardens contain stone water basins (tsukubai), which are used for ritual cleansing, especially ahead of tea ceremonies. The basins vary from simple depressions in uncut stone to elaborate carved stone creations, and are usually provided with a bamboo dipper for scooping up water. These days they often appear as a decorative addition more than for a practical purpose. Water basins are an essential element of tea gardens and are often paired with lanterns.

Paths

Paths became an integral part of Japanese gardens with the introduction of strolling and tea gardens. Strolling gardens feature circular paths constructed of stepping stones, crushed gravel, sand or packed earth, which are carefully prescribed to lead visitors to the best - albeit controlled - views of the garden. Winding paths also serve to segregate different areas, such as an isolated grove or hidden pond, from each other so that they may be contemplated individually.


Source: http://www.japan-guide.com/e/e2099_elements.html and http://espacepourlavie.ca/en/elements-japanese-garden